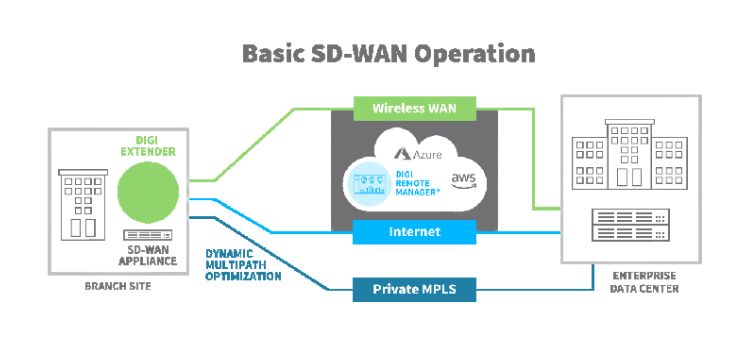
This post will show you how you can upgrade Cisco SD-WAN Viptela Software step by step
SD-WAN Viptela Software Upgrade
● Use the software Upgrade screen to download new software images and to upgrade the software images running on a Viptela device.
● From a centralized vManage NMS, user can upgrade the software on Viptela devices within the overlay network and reboot them with the new software. They can do this for a single device or for multiple devices at the same time.
● When user upgrade a group of vBond orchestrators, vEdge routers and vSmart controllers, the software upgrade and reboot is performed first on the vBond orchestrator, next on the vSmart controllers, and eventually on the vEdge routers. For vEdge routers, up to five routers can be upgraded and rebooted in parallel simultaneously.
● User cannot embody the vManage NMS in a cluster software upgrade operation.
● It is usually recommended that you simply perform all software upgrades from the vManage NMS instead of the CLI.
Viptela have separate software upgrade pictures for hardware (vEdge routers) and IOS-XE devices and Cloud vEdge upgrade. Here in our lab we are operating with Cloud vEdge so we will use software image for Cloud upgrade. Similar image can be used if you are using vManage on VMware.
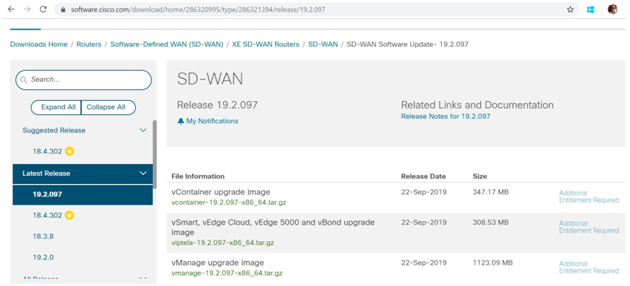
Note: in above vManage have separate software picture and rest other controllers (vSmart, vBond) & vEdge will use similar picture for upgrade.
User can store the upgrade files on vManage or remote server from where controllers or vEdge devices can download the recent software.
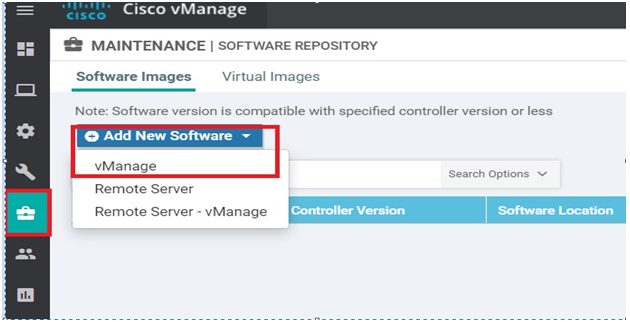
Task 1: Store software pictures on vManage:-
Steps for the process are given below
● Go to Maintenance
● Then click on Software Images
● In Software images click on Add new Software
● Move to vManage
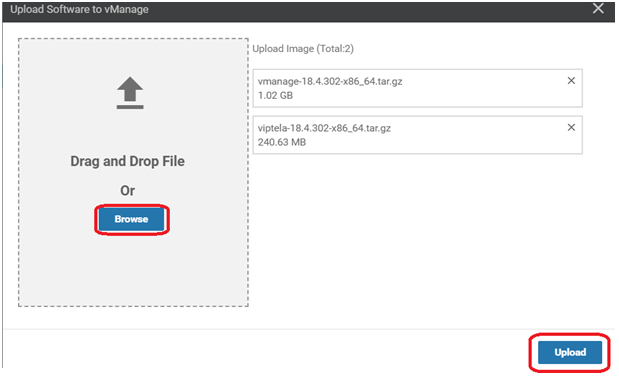
● or you can also drag the file from location here in our cases we will select our management system
● finally upload the picture

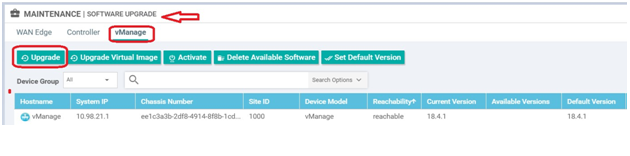
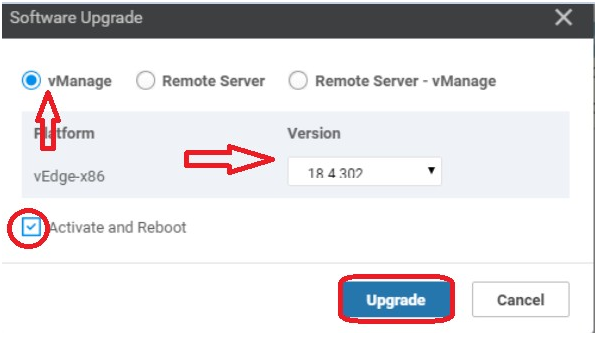
Task 2: Upgrade software version on Vmanage:
Steps for the process are given below
● Firstly go to Maintenance
● Then go to Software Upgrade
● From there Click on vManage
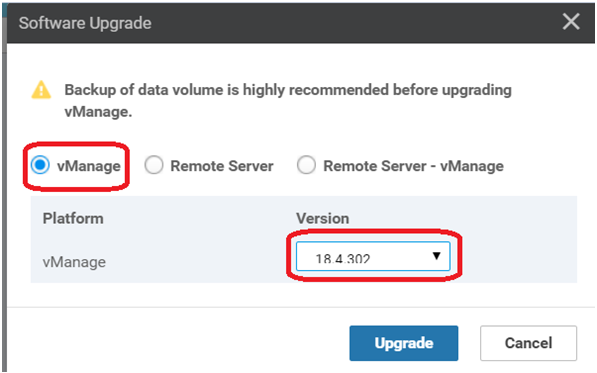
● finally Upgrade
● Select appropriate version from list
● Once image is successfully uploaded you can verify it and activate to use the new software
● For verification purpose use “show software” command and activate you

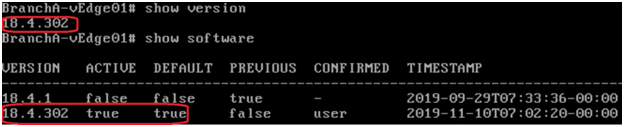
Verification and activation of new images:-
In below snap you can notice latest software image is available on device but not activates yet, after activation you should see 18.4.302 should show as true.

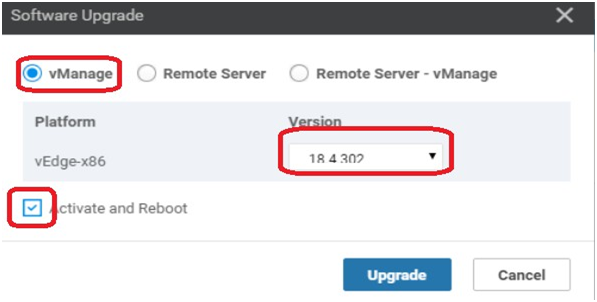
Activate new Software at vManage following below step:-
Steps for the process are given below
● Firstly Go to Maintenance
● The go to Software Upgrade
● From there Click on vManage
● Activate new software
● Select appropriate version from list
● eventually click on Activate
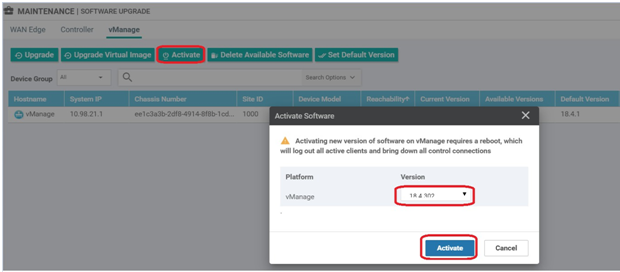
Note: Clicking on Activate will reboot you vManage.
After Activation you can verify using “show software version”

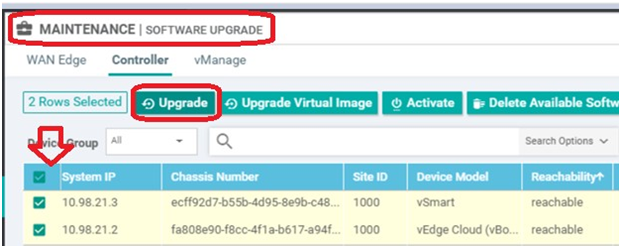
Task 3: Perform Software upgrade at vbond and vSmart controller.
Steps for the process are given below
● Firstly go to Maintenance
● Then click on Software Upgrade
● then Click on Controller
● Upgrade
● Select the controllers
● Click software Upgrade again and choose vManage
● Select appropriate version from list
● Finally activate and reboot


Task 4:- Upgrade vEdge at Branch and Data centre.
Note: This should be your last step and need be upgrade after all the controllers are successfully upgraded.
Steps for the process are given below
● Firstly go to Maintenance
● the go to Software Upgrade
● From there Click on WAN Edge
● Select list of devices or device
● then Upgrade
● Select appropriate version from list
● finally Click on Activate and reboot

Verification:-
Login on any vEdge and execute show software or show version.
Comments (0)

Categories
Popular posts

Cisco Nexus Port Channel: Configuring ...
4 Apr 2024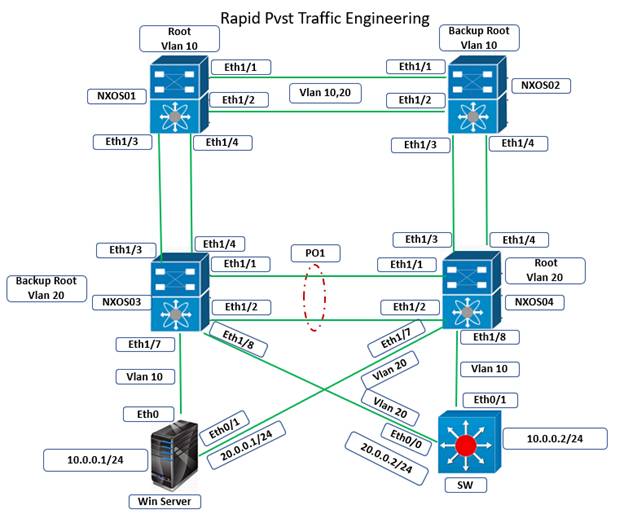
Configure Rapid PVST on Cisco Nexus
5 Apr 2024
Palo Alto Exam Cost: PCNSA, PCNSE & More
28 Mar 2024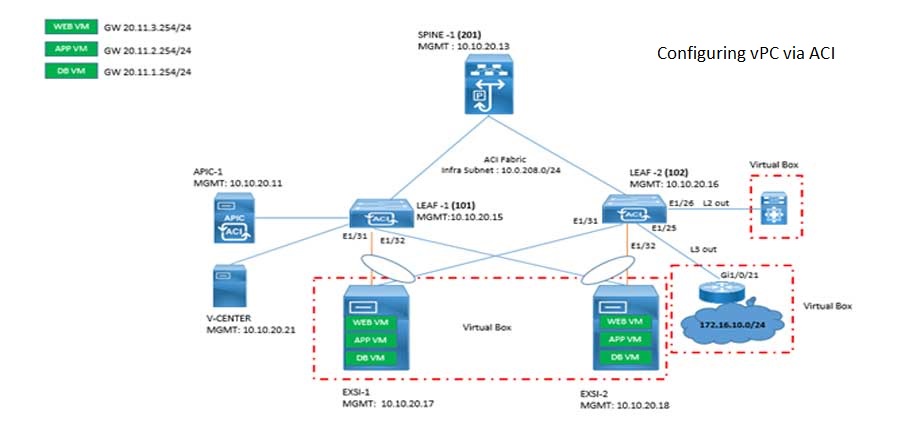
Cisco ACI VPC Configuration Task Steps
6 Jan 2024Recent posts

AWS Certification Path: Amazon Cloud
18 Apr 2024
SD-WAN Vendors Comparison: Choosing the ...
16 Apr 2024
CCNP Certification Cost and Exam Fees
12 Apr 2024
Configure Rapid PVST on Cisco Nexus
5 Apr 2024