
Task
● On bigip-1 apply the default monitor icmp to all the nodes.
● On bigip-1 apply the node specific monitor to node 172.16.11.1
● On bigip-1 apply the default monitor gateay_icmp to pool http.
● Create a ssh custom monitor and apply on pool http and member server01.
● On bigip-1 apply the member specific monitor http to member server02 and ssh monitor to server03
Explanation
Monitors determine the availability and performance of devices, links, and services on a network. Health monitors check the availability. Performance monitors check the performance and load. If a monitored device, link, or service does not respond within a specified timeout period, or the status indicates that performance is degraded or that the load is excessive, the BIG-IP system can redirect the traffic to another resource.
Monitors gather information about your network. The information that monitors gather is available for you to view. You can use this information to troubleshoot problems and determine what resources in your network are in need of maintenance or reconfiguration.
Address check monitors
An address check monitor provides a simple verification of an address on a network. This type of monitor sends a request to a virtual server.
When a response is received, the test is successful. When an address check monitor is associated with a node, it determines the availability of all services associated with that node’s IP address. If the monitor is unsuccessful in determining that a node is available, the monitor marks the node and all pool members at that IP address as Offline.eg.icmp
Application check monitors
An application check monitor interacts with servers by sending multiple commands and processing multiple responses. Eg. FTP
Service check monitors
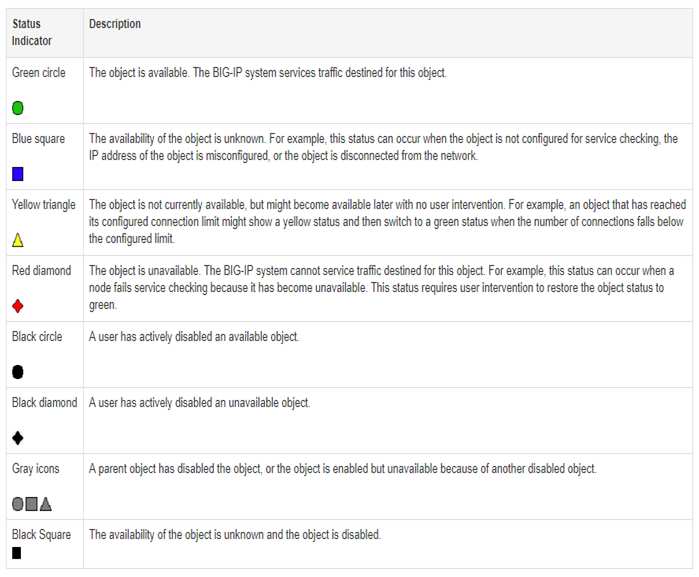
A service check monitor determines whether a service is available. This type of monitor opens a connection to an IP address and port, and then closes the connection. When the TCP connection is established, the test is successful. Following is the list of status indicator and the description
Configuration
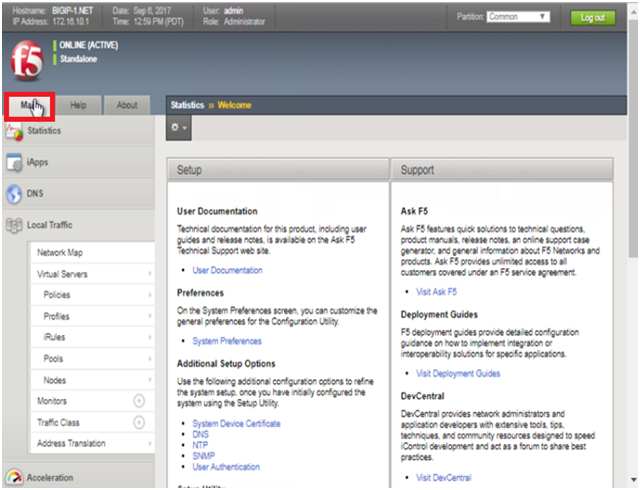
On bigip-1 apply the default monitor icmp on node Get the GUI access of bigip-1 by typing the HTTPS://172.16.10.1 on the browser.Type the admin credential And you will see the following page of bigip

Now click on the local traffic menu and it will be expanded and click on node. As shown below
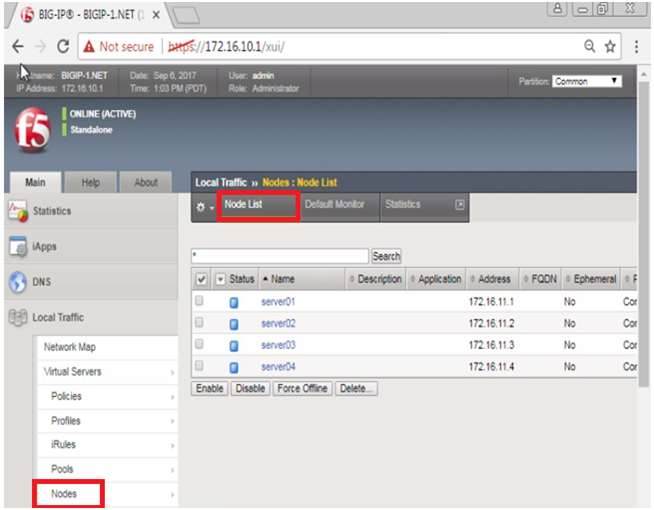
As soon as you will click on node you will see the following page Following page will appear showing you the node list To apply the default monitor click the default monitor tab marked as red as shown below:
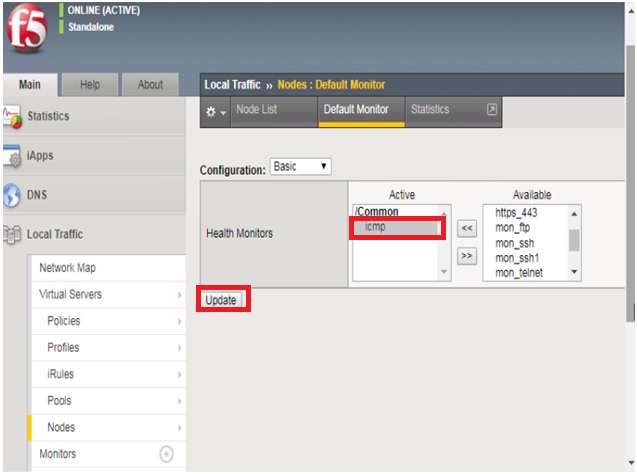
As soon as you will click on the default Monitor following Page will appear In the configuration section health monitor as presently none is active and Under available section there are list of available monitor are present.Click on one you want to apply and then click on the arrow to move it into under the Active section.
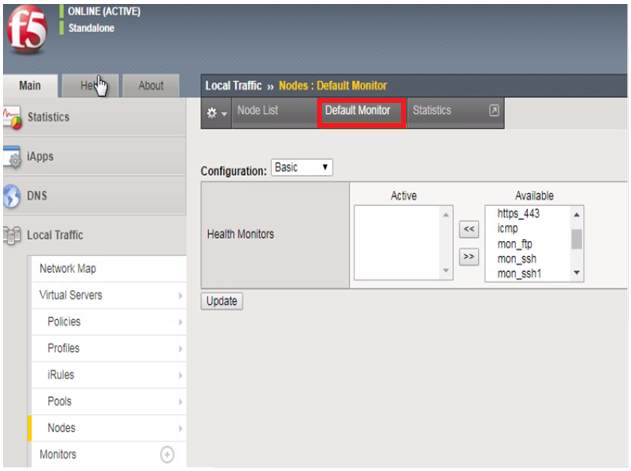
As soon as you will click on left arrow it will come under the available section As shown below and the click on update in this example we are applying the icmp monitor and click on update to apply it.
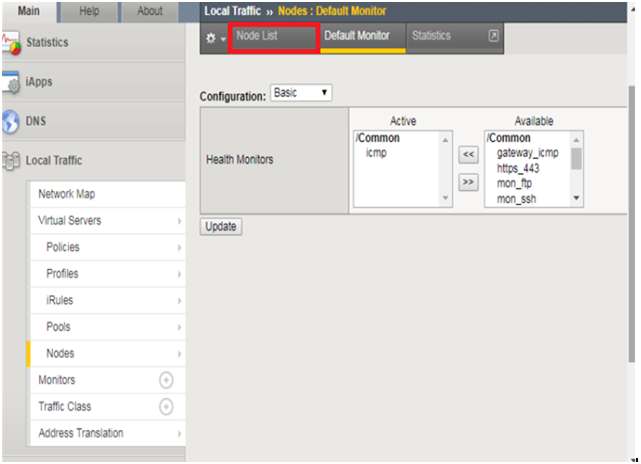
After applying it you go to node list by either clicking on node under local traffic section or by clicking on the node list
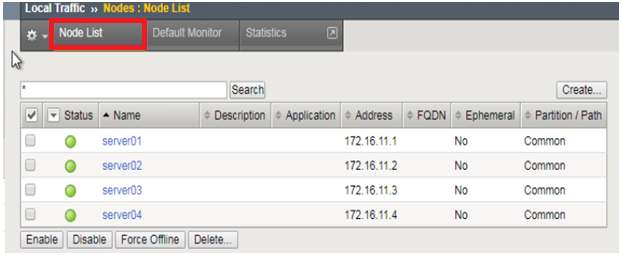
As as you will click node list following page will open showing you the node list and their status green circle means that the all the node is available and are replying to the icmp echo message send by the bigip-1 according to the applied icmp monitor
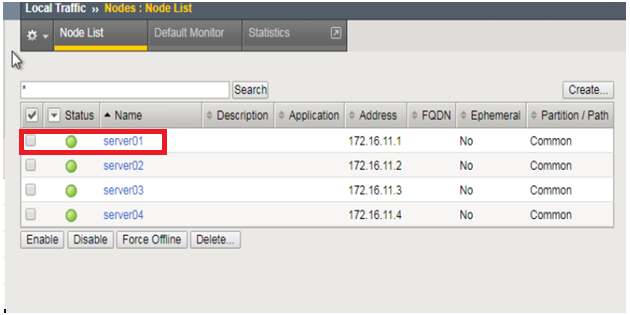
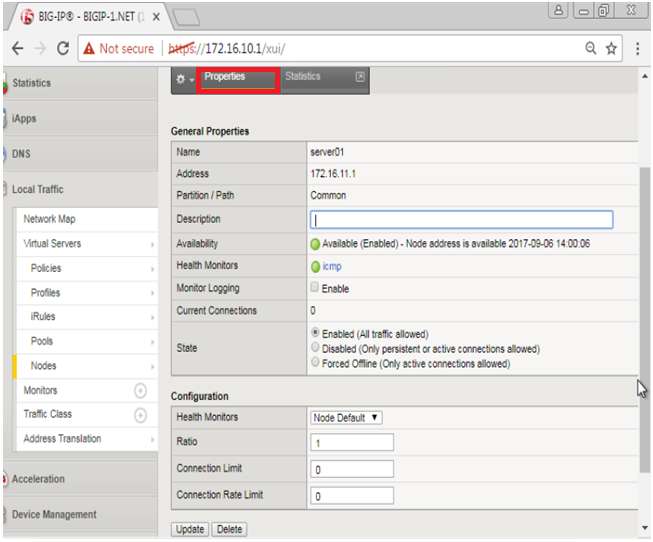
Now to apply the node specific monitor on a particular node select the node In our example we are selecting the node server01 click on it as shown below
When you will click on the server 01 the following page will open showing you the properties of node-server01 and you will see that this node has inherited the default monitor that we applied earlier
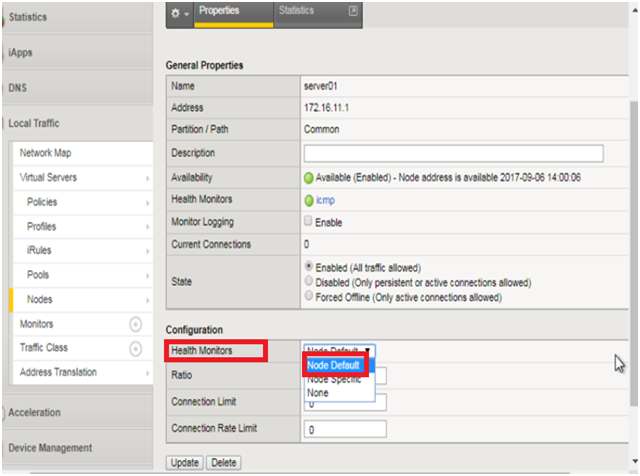
Now to change the node specific monitor in the configuration section click on the health monitor and select the node specific In place of node default as shown below:
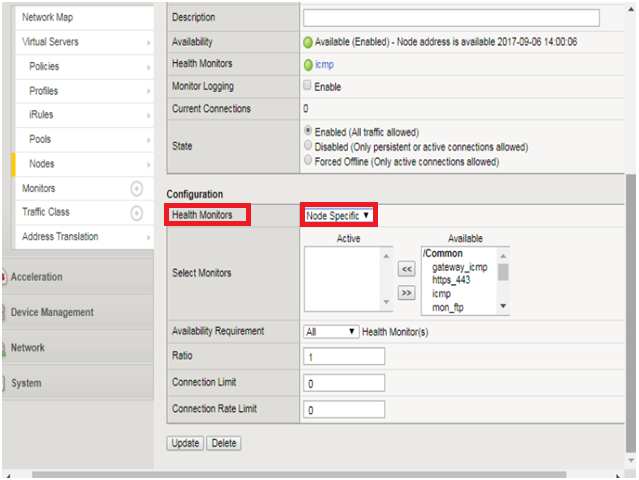
As soon as you will select the node specific you will see that two more option Will appear select monitor and availability requirement. Select the monitor you want apply and move it from the available section to the active section as we previously done while applying the default monitor. Availability requirement is use when you want to apply multiple monitors and You have the option two give you status according to the single or all monitors.
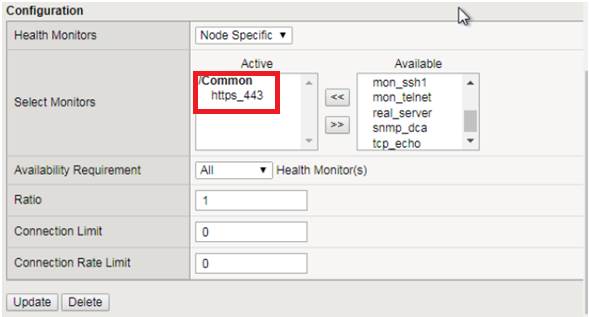
So in this we are applying the https_443 monitor node specific monitor to the node -server01 as shown below and click update
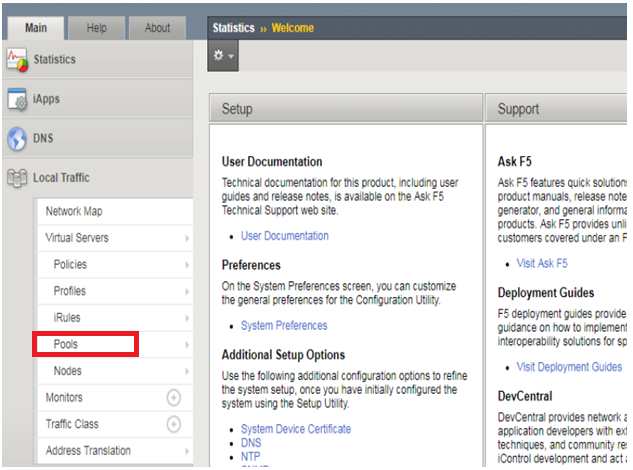
On bigip-1 apply the default monitor gateay_icmp to pool http.First of all you have to navigate to the pool on which you want apply the monitor Expand the local traffic section and click on the pool as shown below
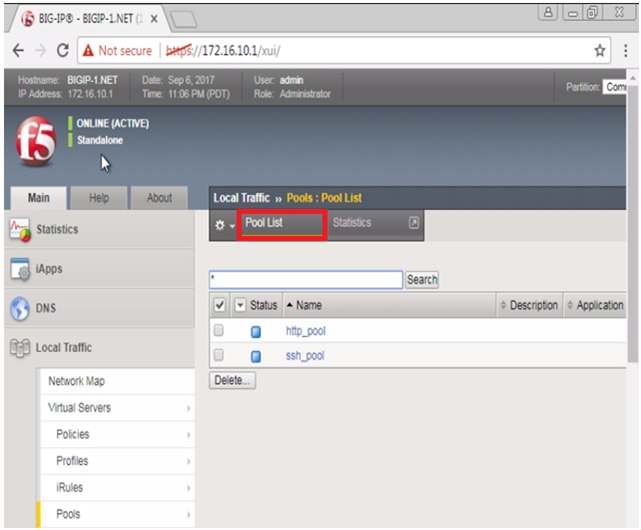
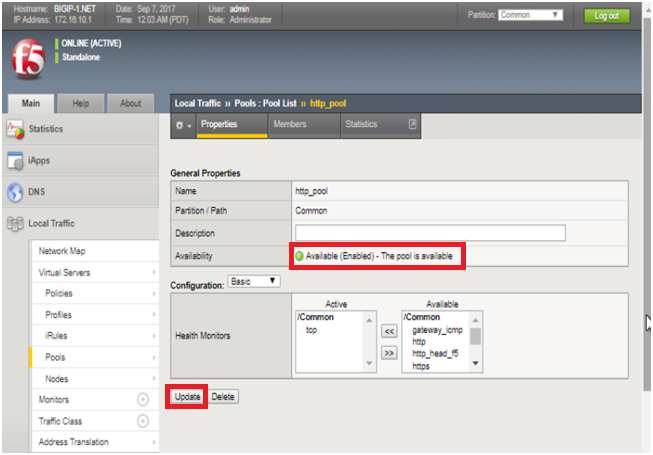
When you will click on the pool following list of pool will open in this example two pools are already configured here http_pool and ssh_pool in this example will be choose http_pool to set up the monitor. Click on the http_pool.
As soon as you will click on http_pool following properties page will open. In the configuration section it will show list of available monitors and active monitors. Move the monitor you want to apply from available to active .In this example will apply the tcp monitor to the pool.
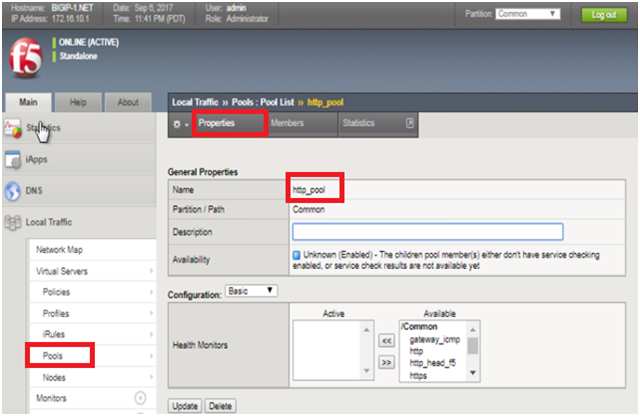
Move the monitor you want to apply from available to active. In this example lets say we will apply the tcp monitor to the pool as shown below

And then click on update
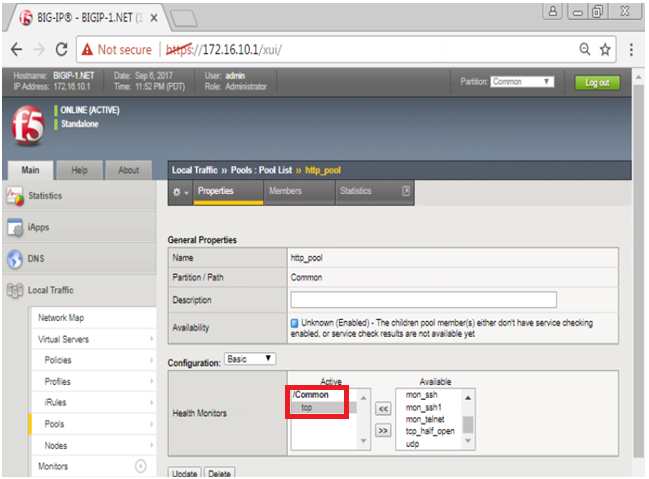
As soon as you will click on update under the availability section you will the status indicator turn from blue square (unknown) to green ciecle (available)
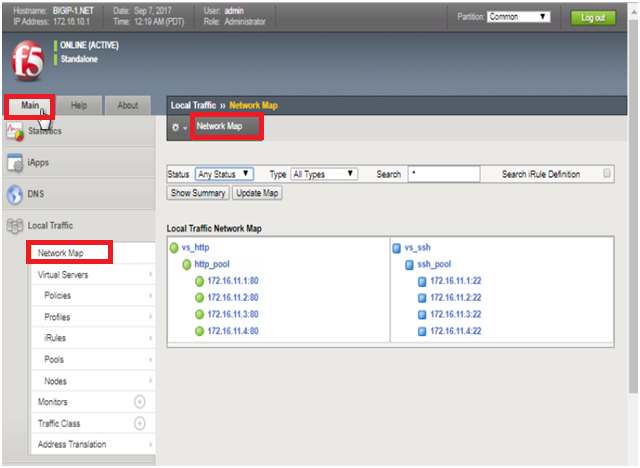
You can also click on network map to see the status of various object. Click on network map and following page will open
Comments (0)

Categories
Popular posts

Cisco Nexus Port Channel: Configuring ...
22 Apr 2024
Configure Rapid PVST on Cisco Nexus
5 Apr 2024
Palo Alto Exam Cost: PCNSA, PCNSE & More
28 Mar 2024
Cisco ACI VPC Configuration Task Steps
6 Jan 2024Recent posts

AWS Certification Path: Amazon Cloud
23 Apr 2024
CCNA Course Syllabus: Topics Explained
23 Apr 2024
Cisco Nexus Port Channel: Configuring ...
22 Apr 2024
SD-WAN Vendors Comparison: Choosing the ...
16 Apr 2024


