
Voice over IP (VoIP, or voice over Internet Protocol) is communication protocols, involved in the delivery of voice communications and multimedia sessions over Internet Protocol (IP) networks. various terms commonly used with VoIP are IP telephony,Internet telephony, voice over broadband (VoBB), broadband telephony, IP communications, and broadband phone.
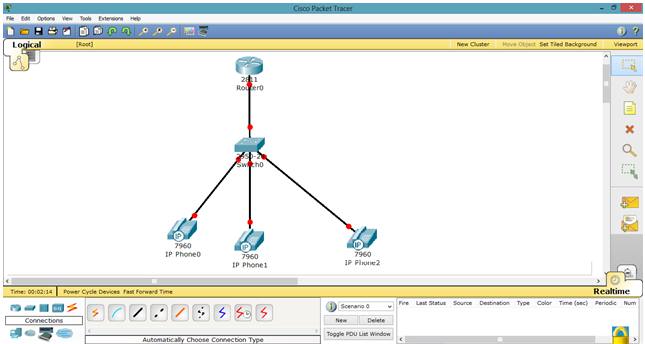
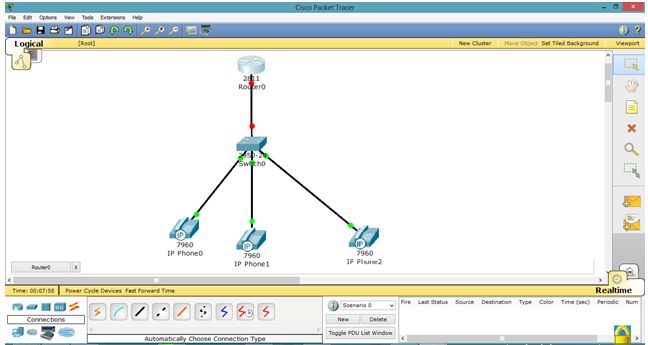
Let us apply it on packet tracer.
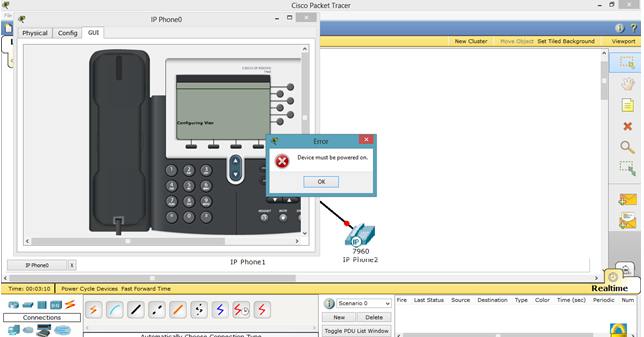
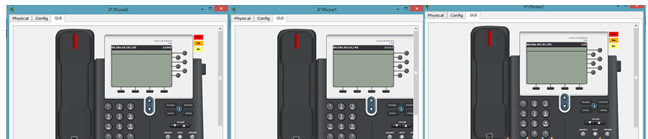
Phone is displayed below. And when we try to go to any other mode its give us error and ask us to switch it on first.
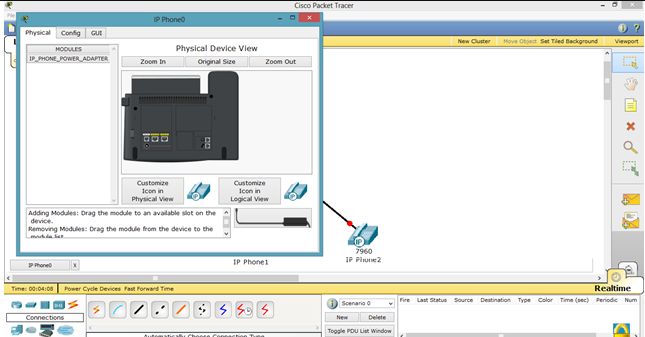
For that, go to Physical mode and put the power adapter (in the bottom right corner) into the phone as shown in figure.
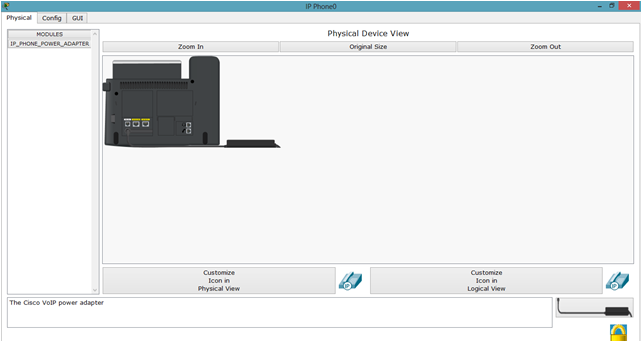
Now, we have inserted the antenna into IP phone. Repeat it for other phones as well.
Now, we see that interface of IP phone is UP.
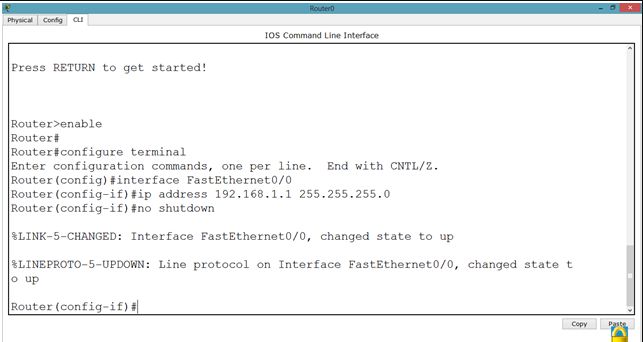
Now, go to router and assign IP address.
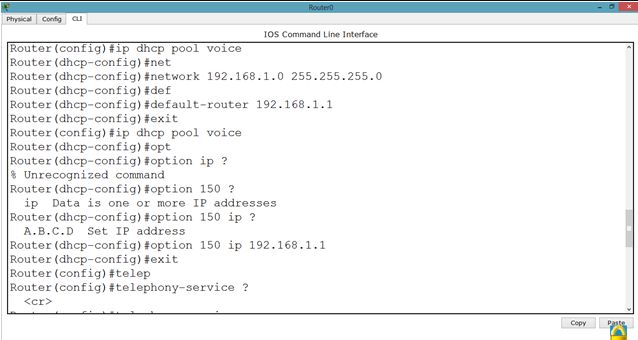
We will have to set DHCP server on router to assign IP addresses to IP phones.

We will have to give an additional command for voip.
Router(dhcp-config)#option 150 ip 192.168.1.1
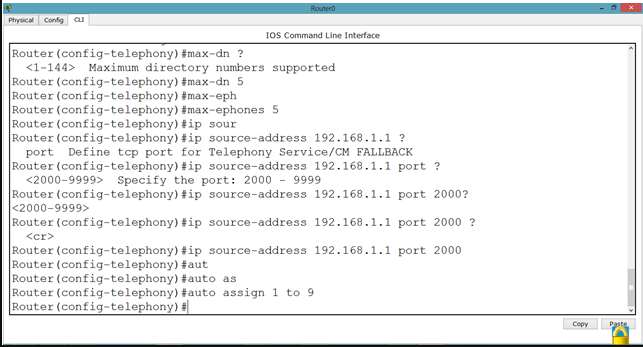
Now, let us apply commands to the router for voip. You might have noticed we took 2811 series router because it facilitates the following commands.
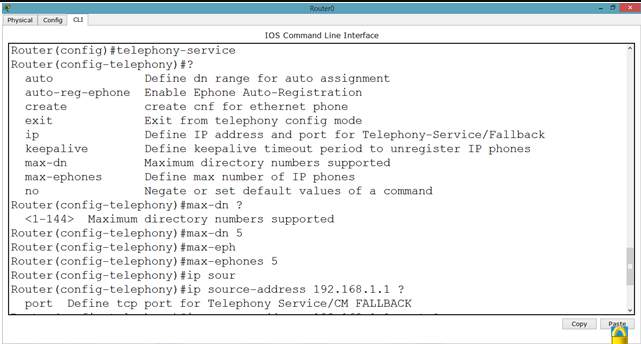
Continued.
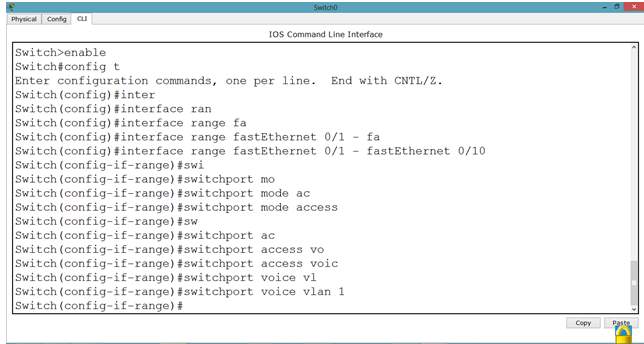
Now, we will go to the switch and make the interfaces support voip as follows.
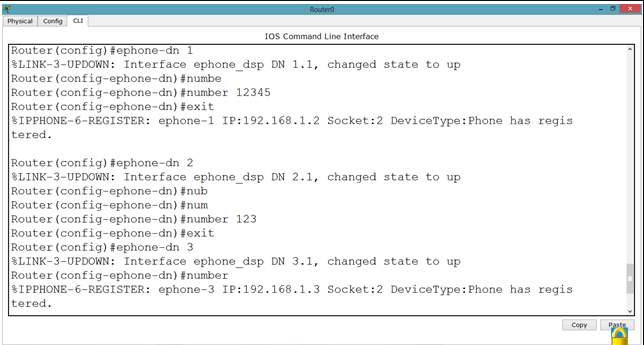
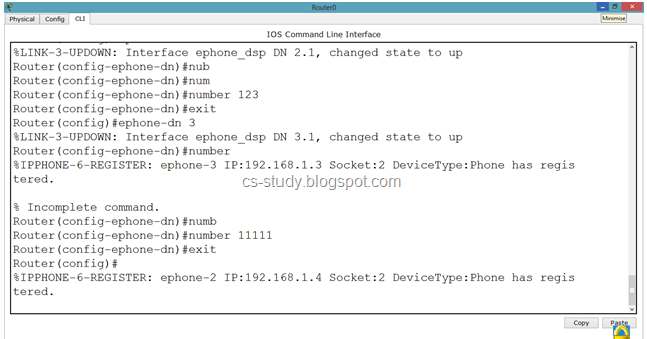
After that, we will have to assign phone number to our IP phone by applying following commands
Continued…
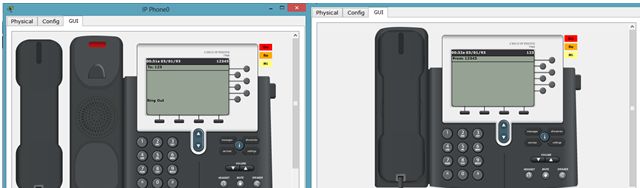
Now, we can see that in GUI mode of Phone, we have a phone number available.
This means that we can call from one phone to the other. Lets do that.
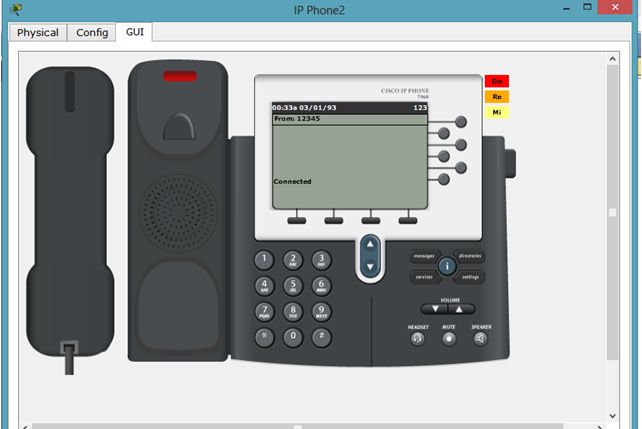
And when we pick up the reciever, it says that we are connected 🙂 .
Commands on Router for VOIP
Router(config)#ip dhcp pool voice
Router(dhcp-config)#option 150 ip 192.168.1.1
Router(dhcp-config)#exit
Router(config)#telephony-service
Router(config-telephony)#max-dn 5
Router(config-telephony)#max-ephones 5
Router(config-telephony)#ip source-address 192.168.1.1 port 2000
Router(config-telephony)#auto assign 1 to 9
Router(config-telephony)#exit
Router(config)#ephone-dn 1
%LINK-3-UPDOWN: Interface ephone_dsp DN 1.1, changed state to up
Router(config-ephone-dn)#number 12345
Router(config-ephone-dn)#exit
%IPPHONE-6-REGISTER: ephone-1 IP:192.168.1.2 Socket:2 DeviceType:Phone has registered.
Router(config)#ephone-dn 2
%LINK-3-UPDOWN: Interface ephone_dsp DN 2.1, changed state to up
Router(config-ephone-dn)#number 123
Router(config-ephone-dn)#exit
Router(config)#ephone-dn 3
%LINK-3-UPDOWN: Interface ephone_dsp DN 3.1, changed state to up
Router(config-ephone-dn)#number 11111
Router(config-ephone-dn)#exit
Commands on Switch for VOIP
Switch(config)#interface range fastEthernet 0/1 – fastEthernet 0/10
Switch(config-if-range)#switchport mode access
Switch(config-if-range)#switchport voice vlan 1
Comments (0)

Categories
Popular posts

Cisco Nexus Port Channel: Configuring ...
4 Apr 2024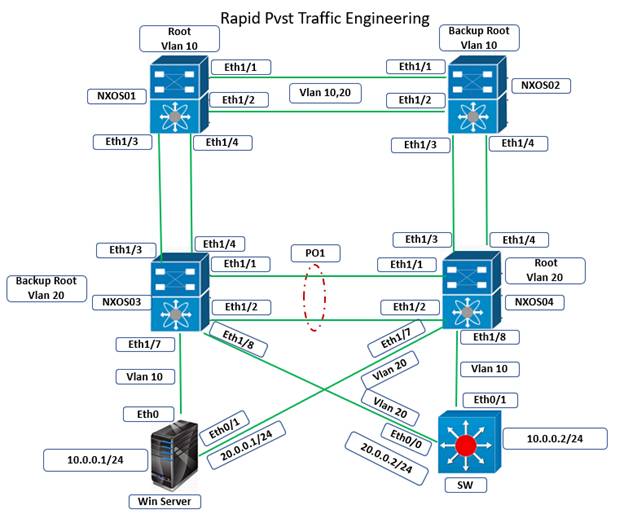
Configure Rapid PVST on Cisco Nexus
5 Apr 2024
Palo Alto Exam Cost: PCNSA, PCNSE & More
28 Mar 2024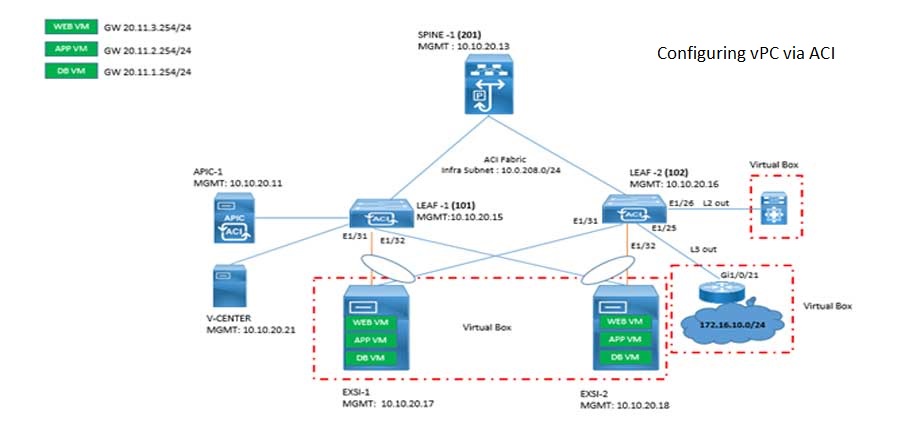
Cisco ACI VPC Configuration Task Steps
6 Jan 2024Recent posts

AWS Certification Path: Amazon Cloud
18 Apr 2024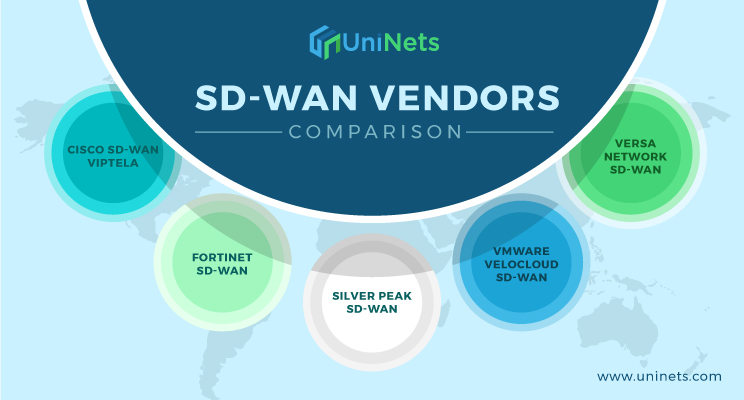
SD-WAN Vendors Comparison: Choosing the ...
16 Apr 2024
CCNP Certification Cost and Exam Fees
12 Apr 2024
Configure Rapid PVST on Cisco Nexus
5 Apr 2024